
Posted by Tastefully Simple on April 30, 2021
Tired of the same weekday lunches? Or looking for some fresh salad recipes this spring? We’ve got you covered.
Why We Love Jar Salads
Mason jar salads have been all the rage on Pinterest for the past couple years, and honestly, there are a lot of reasons to love them.
• Make healthier choices. Trying to maintain a healthy lifestyle or just make a better-for-you swap or two? It’s much easier to resist the temptation of fast food when you already have weekday lunches packed with protein and fresh veggies right at your fingertips.
• Enjoy delicious variety. You can use all kinds of different dressings and flavor combinations!
• Save time and money. Prep once. Eat for days. Plus, you’ll be more efficient with your grocery expenses, too.
• Be more eco-friendly. Since glass jars are easy to clean and won’t stain like plastic lunch containers, you can re-use them over and over.
Choosing Jar Sizes & Styles
Wait … what type of jars work best? Wide mouth jars make it a bit easier to get your ingredients in and out compared to the regular variety. In terms of size, it’s really up to you. Personally, I’d recommend using quart-sized jars if you’re making hearty salads. Choose pint-sized jars for side salads or salads with mostly greens and only a few mix-ins.
How to Assemble Your Mason Jar Salads
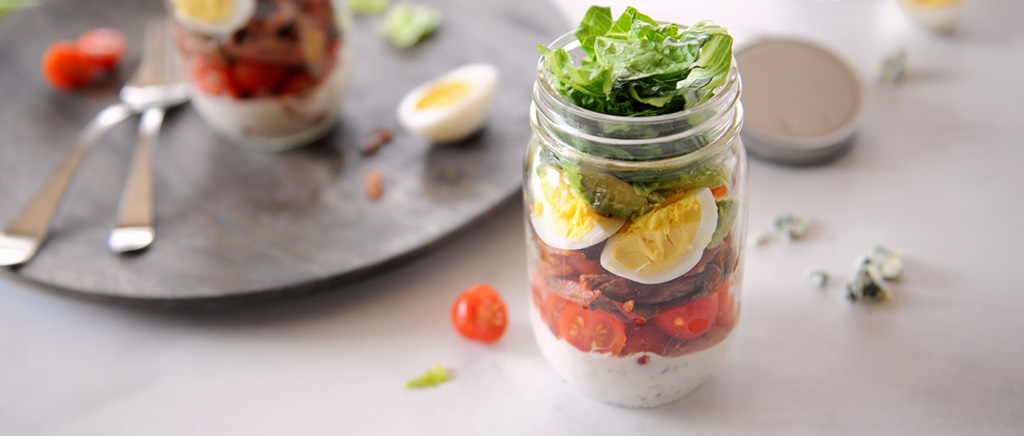
Step 1: Start with Dressing
While there are many different theories out there about the best way to layer your ingredients, they all agree on one thing: dressing always goes on the bottom.
This will keep your veggies from getting soggy. In general, 3 tablespoons of dressing per jar is a good rule of thumb – depending on the type and how much you like.
Next, add veggies that aren’t as likely to absorb liquids, such as carrots, radishes, bell peppers and cucumbers. You can layer on cherry tomatoes, sweet corn, black beans and grains like quinoa, too.
Step 3: Add Proteins & Cheese
Next, layer chunks of chicken, steak, bacon, hard-boiled eggs or whatever protein you’d like. Sprinkle with cheese.
Step 4: Grab Greens
Finally, fill the remainder of the jar with leafy greens like lettuce, spinach and arugula. Seal the lid, and voila! It’s ready to store in your refrigerator.
Oh, and if you want any kind of garnish like wonton strips, cashews or almonds, you can either sprinkle ‘em on top of your leafy greens or store them in a separate bag to ensure they stay crunchy.
When you’re ready to eat, simply grab your mason jar, empty it into a bowl and presto! You’ve got a fresh and delicious lunch.
Quick Salads to Get You Started
Here are a few fun combos to try this week:
This smoky Southwest-style salad is loaded with black beans, sweet corn, tomatoes and rotisserie chicken. (Just mix ½ cup ranch + ¼ cup Smoky Bacon BBQ Sauce for the dressing … it’s smoky, creamy, and one of my all-time faves.)
So fresh and hearty, this is my husband’s personal favorite for lunch. It’s layered with cherry tomatoes, grilled steak, crumbled bacon, hard-boiled eggs, avocado and crunchy Romaine – all complete with a creamy herb dressing that’s ready in seconds.
Filled with crisp garden veggies, peanutty chicken, mandarin oranges and sweet-tangy dressing, this Asian-inspired salad is fresh and light – perfect for springtime.
And remember, you can mix and match all kinds of different ingredients for different types of salads. Caesar, chef, taco, caprese, Mediterranean, Waldorf, you name it. You can also modify tons of salad recipes to fit mason jars, so check out more ideas on Tastefully Simple’s website for inspiration.
Simple. Fresh. Delicious. Here’s to making lunchtime easier (and healthier), my friends… without flipping your lid!
– Jen